
Countertop Demolition: it’s loud, messy, and, if I’m being honest, a little overwhelming—even for someone in the business.
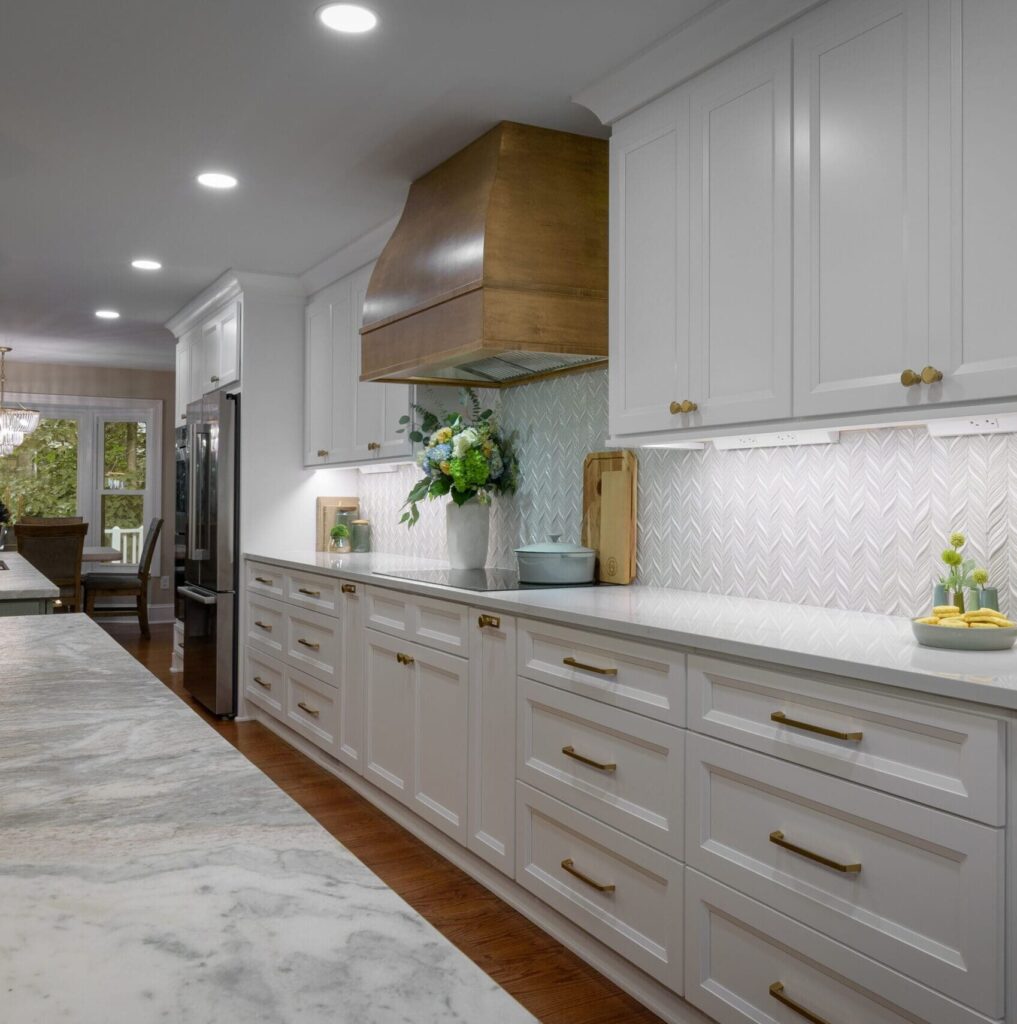
For my project, I replaced old, stained granite countertops with Calacatta Marble on the kitchen island and soapstone for the perimeter. I also upgraded to a full slab backsplash using Calacatta material, added a waterfall edge to one side of the island, replaced the hood, and included features such as pop-up outlets, hidden outlets, and a new Ruvati workstation sink.
As one of Atlanta’s top countertop installation companies, these experiences not only reinforced my expertise but also gave me new insights to share. Whether you’re updating old surfaces or planning to add premium materials, the demolition stage is an essential part of your home renovation process.
Here’s what I learned from the trenches of my own demo day—and how it’s shaping the way we help clients navigate theirs.

1. Dust Gets Everywhere—Even Where You Least Expect It
I walked into my kitchen after the crew finished cleaning, expecting the usual sparkle of a job well done. And it was—until I opened a drawer. That’s when I discovered fine dust clinging to the rails, the hinges, and even inside some cabinets. It felt like a mini treasure hunt, except the treasure was a layer of grit that took hours to remove.
Cleaning a kitchen this size is no small feat, and my team worked diligently for over an hour. But the reality is, dust is sneaky. Even with all the right barriers, some of it finds its way into the tiniest cracks and corners.
Story Highlight: I found myself scrubbing drawer tracks with an old toothbrush, laughing at how something so small could slow me down. It was humbling but also a reminder of just how thorough cleanup needs to be.
What We’re Doing About It:
We’re now exploring partnerships with cleaning services to offer post-demo cleanup packages, so clients can skip the toothbrush and enjoy their new space faster.
2. Even Stone Has Its Limits
There’s nothing like seeing a 6-foot slab of stone being lifted off your counters to make you hold your breath, especially when it’s delicate materials like Calacatta Marble or Soapstone. My team handled it with the kind of care that makes me proud—strategic, methodical, and precise. But as they lifted the slab, I heard the dreaded crack. A piece broke clean off, and before I could even react, it hit the floor.
Thankfully, we had everything protected with cardboard and drop cloths, but the 30-pound fragment left a mark anyway. It’s a sobering reminder that no matter how hard stone is, it’s still fragile under stress.
Story Highlight: My first instinct was to panic about the floor, but the crew reassured me: “This is why we prep the way we do. The mark is minor, and it’s fixable.” It was a powerful moment of perspective—and a testament to the importance of a prepared team.

3. Safety First: No Exceptions During Countertop Demolition
One of the most important lessons I’ve learned—and want to share—is how critical safety planning is for demo day. The demolition zone is a high-risk area with sharp tools, flying debris, and heavy materials being moved. Taking proactive steps to prevent accidents is key, especially when working with heavy stone materials like granite or marble countertops. Keeping the demolition zone clear and minimizing traffic ensures a smoother process.
Story Highlight: Before my own project began, I took time to understand the potential risks of countertop demolition and made a plan to minimize them. Keeping people and pets out of the area was non-negotiable—it’s one of the simplest ways to ensure safety. We used physical barriers and reduced foot traffic to keep the demolition zone clear. By focusing on prevention and clear communication, the process was smooth and hassle-free.
4. Clear Countertops and Cabinets (Trust Me on This)
Before the demo began, I thought I was ahead of the game. I cleared the countertops and left a few essentials in nearby cabinets. By the time the day ended, I was shaking dust out of my favorite mugs and cleaning shelves that I hadn’t touched in years.
Story Highlight: Dust and debris have a knack for finding their way into the smallest, most unexpected places. During my project, I discovered fine dust coating the inside of cabinets and even drawer pulls, which required thorough cleaning to remove. Worse, larger pieces of stone debris can fall into open cabinets, potentially causing damage to shelves or items left inside. Emptying these spaces completely is critical to avoid extra work and prevent damage during the demolition phase.
Pro Tip: Clear everything out. While it might feel like a lot now, you’ll be glad you did. Your things will remain clean, and tidying up will be much easier.
5. The Unexpected Will Happen, and That’s Okay
From our experience, outdated plumbing can sometimes break during the countertop demolition process, leading to unexpected issues. To avoid such risks, I made sure to hire a certified plumber to disconnect my sink and gas cooktop ahead of time. A certified plumber can also turn off the water to your home to prevent accidental leaks and water damage, ensuring everything is handled safely and efficiently.
Pro Tip: Always schedule disconnections a day or two before demolition begins. This gives you time to address any surprises with the plumbing and ensures the crew can focus on the demolition without delays. Taking this precaution minimizes potential disruptions and provides peace of mind during an already hectic phase.
Key Takeaway: Expect to Clean—and Then Clean Again
Even with the best prep and a top-notch crew, demo day is messy, whether you’re tackling a kitchen renovation in Smyrna or updating countertops in Atlanta. I realized how much easier the process would be with a cleaning service ready to step in. That’s why we’re now working on a partnership to offer this as an optional service for clients. Let’s face it—your time is better spent enjoying your new space than scrubbing drawer rails.
5 Must-Know Tips to Survive Countertop Demolition Day
1🎻 Clear off countertops and empty nearby cabinets to keep your belongings safe.
2🎻 Protect floors and furniture with drop cloths or plastic sheeting to make cleanup a breeze.
3🎻 Disconnect your plumbing ahead of time—we can recommend a trusted plumber if needed.
4🎻 Remove fragile décor like wall art or light fixtures to avoid accidental damage.
5🎻 Keep children and pets out of the area—safety first!
Conclusion: Turning Countertop Demolition Lessons into Action
“Demo day taught me a lot about the process—and about myself. It’s messy, unpredictable, and occasionally frustrating, but it’s also the start of something amazing. By sharing my experience, I hope to make your journey a little smoother, a little cleaner, and a lot more enjoyable. After all, every great transformation starts with a little dust.”
